View from above showing the driver in the center
Views of the computer 3D SketchUp model
Vertical Cutaway front to back showing battery cells in floor four of the passengers
Plan Cutaway through the roof showing the five seating positions and the aisle way
These are all the profile sections cut through the model, and all of the layouts of the 2' x 8' x 1" thick foam sheets. For most of the sheets, I cut two copies to make a 2" thick layer.
This is the PhlatPrinter 3 which is a 3-axis CNC machine I put together from a kit that I used to cut the 1" x 2' x 8' sheets of XPS foam.
I cut about 95 sheets of XPS foam - on a good day, I finished 10-12 sheets. The pieces use jigsaw joints and I glued them together and then stacked the layers, forming a "stair-stepped" core of the chassis.
These are the first pieces ready to have the jigsaw joints glued together
I used 1/2" wooden dowels to align the layers as the glue dries.
Building up the front of the car, layer by layer
Bricks used to press glue surfaces together while the glue dries
Beginning the shaping process, using Stanley SurForm rasps
The rough shaping continues...
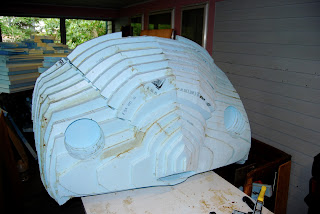
Nose of the car in approximate position
Adding more layers - the dashboard and the front of the battery bays and the placeholder front wheels
The base of the windshield place holder
CarBEN EV5 Ranch?
The first four feet of the front
Next section building up layer by layer
The first six feet of the CarBEN EV5 ready to be joined up - clamping with a ratchet strap and lots of weight required as the glue dries.
I built a level platform to add the rest of the chassis one layer at a time
The beginning of the main hatch door opening
The front half of the CarBEN EV5 chassis sitting in it's proper position. You can see the battery bays getting larger
Sitting back on the platform getting 6"-8" glued on a typical day
8' ladders now required to get to the gluing level
I constructed a temporary shelter that is high enough for what will end up as a 12' high stack of foam layers! The front 2' of the nose will be glued on after I don't need access to the front.
Last couple of layers of the very back/top of the chassis
Last layers of the rear bumper glued in place and drying! I worked from a scaffolding platform on 8' step ladders, and some 12' high step ladders, as well.
All the major gluing is done - the hatch door and wheel skirt panels, etc. left to do.
- Open Source means shared ideas and shared improvements – anybody can build one. Creative Commons (instead of Patents) gives attribution but lets ideas get used as much as possible.
- Build working Prototype to test efficiency and improve construction methods
- Practical and safe and highest efficiency possible using renewable energy
- 300-400 Miles Range on Single Charge using ~55kWh lithium battery, <150Wh/m, >224MPGe
- Coefficient of Drag (Cd) <0.15 with 25.1 sq. ft. frontal area = CdA <3.77 sq. ft. (better than GM EV1)
Design Innovations & Key Features of CarBEN EV5
- Tapered Shape required for low drag w/ narrowed rear wheel track, covered wheels, smooth underside, crisp trailing edges aka Kamm back, wheel strakes, passive air flow through cabin
- Thermal insulation integral to chassis and dual layer windows, heated vests for passengers, slim ergonomic seats allow for air flow saving space and weight
- Center Position for driver for increased crash protection and better use of interior space, three ~6'-4”+ people, one ~5'-8” person, one ~5'-0” person
- All LED lighting, ideal ecodriving design, battery pack in floor for low Cg and better handling
- Side Video Mirrors for reduced frontal area and lowered Cd
Electric Car Advantages
- Energy Independence – No Oil from Foreign Countries & No Military Required & money stays in Local Economy
- Cleaner and cleaner energy over time as we transition to Renewable Energy & lower cost over time
- No gas, no idling, no oil changes, no tuneups, no exhaust system, no multi-gear transmission, no clutch or shifting, lower brake wear because of regenerative braking, virtually no regular maintenance
- Very low energy costs – 2-3¢ per mile vs ~15¢ per mile for average 23MPG car saving ~$12,000 per 100K miles @ $3.50/gal gasoline + ~$3,400 savings on regular maintenance per 100K miles = over $15,000 savings
- Very quiet, very smooth, quick acceleration, smooth torque, great for typical daily driving
Electric Cars & Plugin Hybrids you can buy today
- Nissan Leaf – 116MPGe, seats five, ~80 mile range, as low as ~$22,000 after tax credit
- Mitsubishi i MiEV – 112MPGe, seats four, ~65 mile range, as low as $21,625 ATC
- Tesla Model S – 89-95MPGe, seats five (+ two optional), ~208-265 miles range, ~$60,000 for 60kWh model and $70,000 for 85kWh model, both ATC
- Ford Focus Electric – 110MPGe, seats five, ~76 mile range, ~$31,700 ATC
- Toyota Prius Plugin – 95MPGe/50MPG, seats five, ~11 miles in EV mode + hybrid, ~$29,500 ATC
- Chevrolet Volt – 98MPGe/37MPG, seats four, ~38 miles in EV mod + hybrid, ~$31,645 ATC
I brought my CarBEN EV5 prototype to the Framingham Earth Day Festival this past Saturday (April 27th) on the Framingham Center Common, and it was every bit as good as I could have hoped for.
Previous blog post on CarBEN EV5 design: http://neilblanchard.blogspot.com/2011/03/carben-ev-open-source-project-part-4.html
Build thread: http://ecomodder.com/forum/showthread.php/carben-ev5-full-sized-prototype-construction-5-seat-22529.html
Here's a longer, more detailed walkaround video:
I tried the stabilization in the camera, but it still needs the YouTube processing...
It's got it first dirty bird, and there are glue drops and runs, and rough edges... My son will be helping me move it back into the shelter soon, so I can continue smoothing. The left side in particular needs a fair bit of work. They all show up much more readily in the full light of day!
This is how I am using the longboard sanding tool I bought from Jamestown Distributors. It is a tool normally used on boat hulls, and it is nearly perfect for this, too. The swirling motion and figure 8 motion tend to avoid any gouges or divots.
I was able to even up the surface so that the several low areas are largely gone.
I wish that my video camera had a wide angle lens - I had to position it quite far away, and I hope things so up clearly enough.
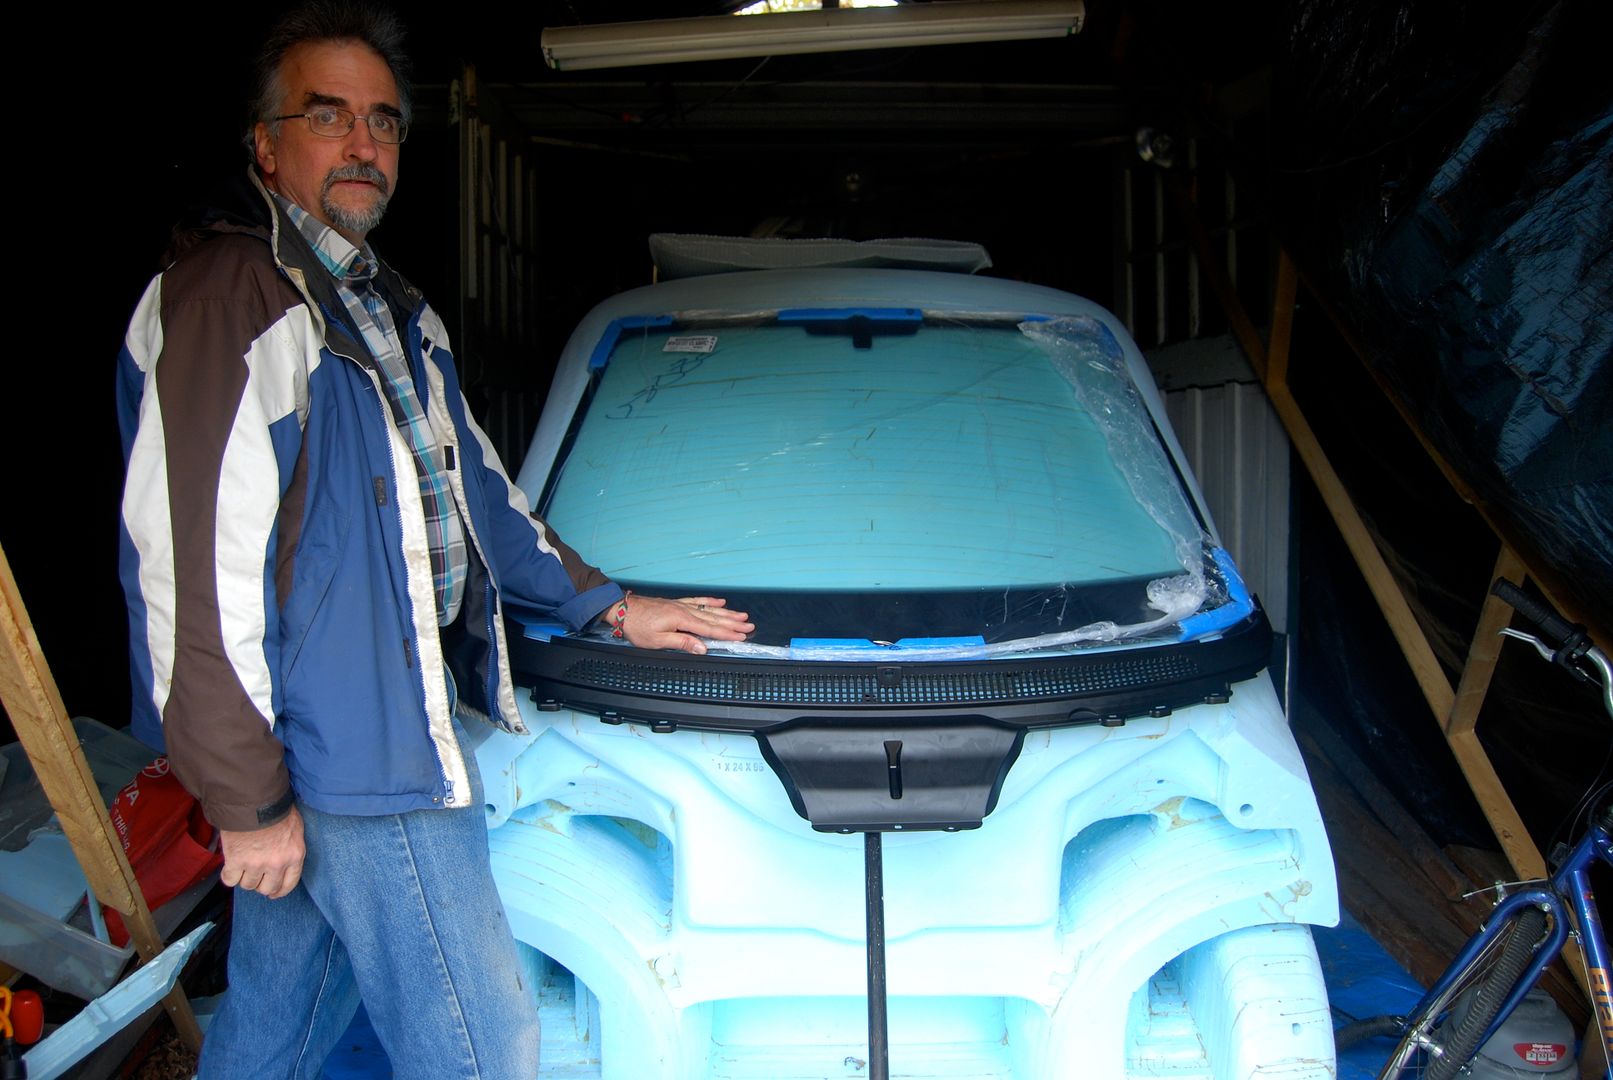
My latest purchase is the windshield and wiper system from a Smart Fortwo:


